How to Configure IVPN on Android for Maximum Privacy
Overview
In a world where online privacy feels harder to maintain, tools like IVPN can make a big difference. This guide walks you through how to configure IVPN on Android for maximum privacy. In just a few steps, you’ll secure your device and enjoy peace of mind.

What is IVPN?
IVPN is a service that protects your online privacy. It encrypts your internet traffic and hides your IP address. That means no one—not hackers, not your internet provider—can easily see what you’re doing online. On Android, it’s a simple app that keeps your data safe wherever you go.
I’ve used IVPN myself, and what stands out is its no-logs policy. Unlike some services that track your activity, IVPN doesn’t keep records. For Android users like me, that’s a huge plus when I’m on public Wi-Fi or just browsing at home.

Why Android Needs Extra Privacy
Your Android phone is with you all the time, right? That makes it a target. Public Wi-Fi at coffee shops or airports can expose your data. Apps might track your location or habits. IVPN steps in as one of the best online privacy tools to stop that.
Here’s what it does: - Encrypts your traffic: No one can peek at your messages or browsing. - Hides your IP: Your real location stays secret. - Blocks trackers: You stay off the radar of nosy apps or sites.
I learned this the hard way once. I was on a hotel Wi-Fi without a VPN, and my email got weird login attempts. Since switching to IVPN, I’ve never had that scare again.
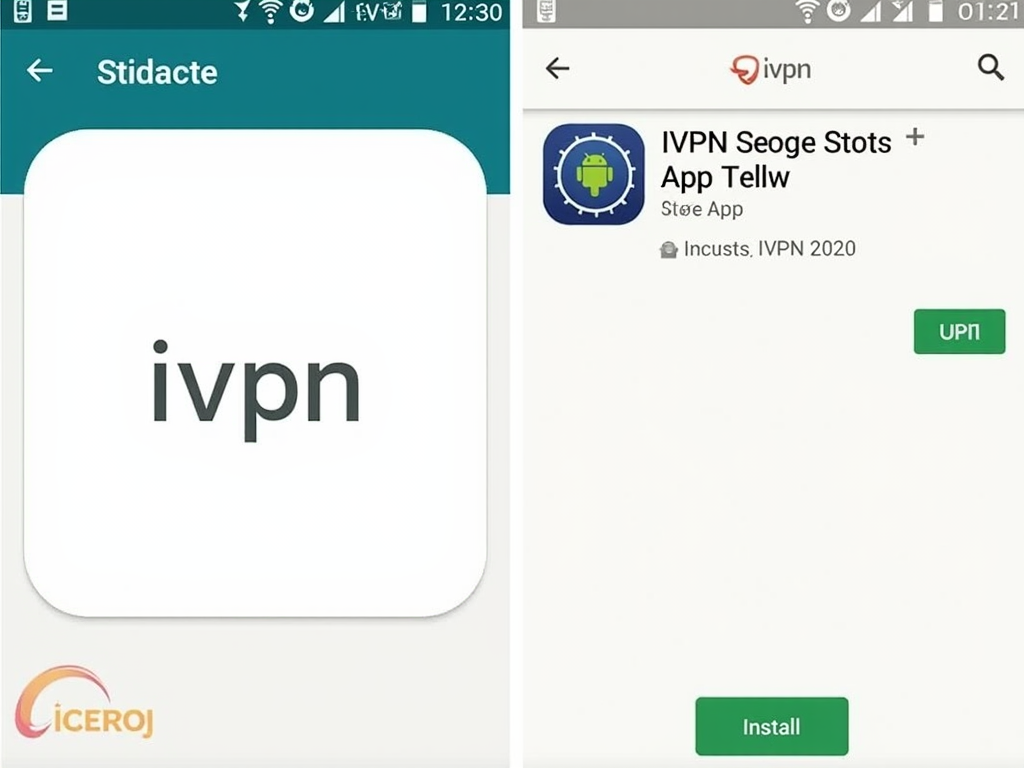
Step 1: Get IVPN on Your Android
First things first—you need the app. Here’s how to do it: 1. Open the Google Play Store. 2. Type 'IVPN' in the search bar. 3. Find the official app and hit 'Install.' 4. Open it and log in—or sign up if you’re new.
The process took me about two minutes. The app’s clean design made it easy to jump right in. If you’re worried about storage, it’s lightweight and won’t clog up your phone.
Step 2: Configure IVPN for Maximum Privacy
Downloading is just the start. To get the most out of IVPN, you need to tweak a few settings. Let’s break it down.
Pick a Privacy-Friendly Server
IVPN has servers all over the world. For maximum privacy, go for one in a country like Switzerland or Iceland—they’ve got strong privacy laws. I usually avoid servers in places with heavy surveillance, like the U.S. or U.K.
In the app, tap the server list and pick one. It’s that simple. I’ve noticed faster speeds with nearby servers, but privacy comes first for me.
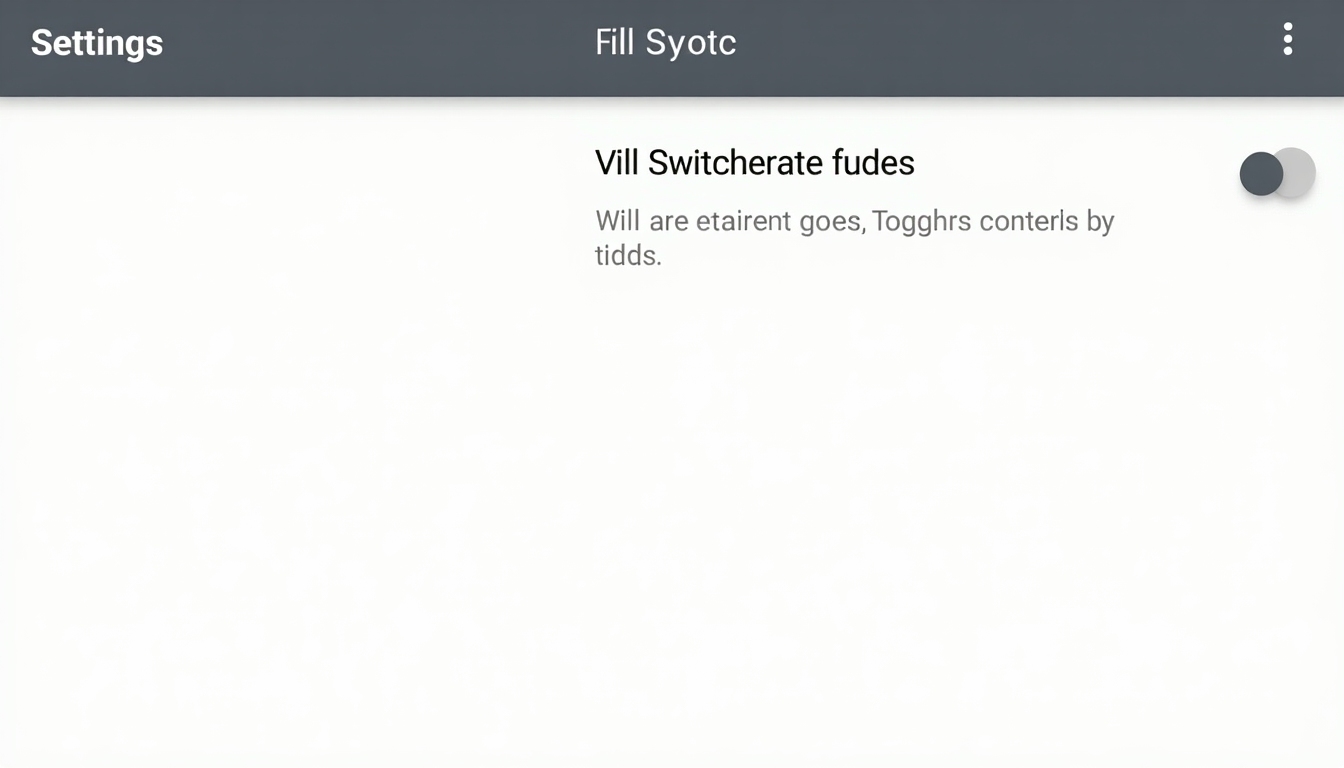
Turn On the Kill Switch
The kill switch is a must. If your VPN drops, this feature cuts your internet so your data doesn’t leak. Here’s how: 1. Open IVPN. 2. Go to 'Settings.' 3. Switch on 'Kill Switch.'
I tested this once by turning off my Wi-Fi. My phone stopped all traffic until IVPN reconnected. It’s a small step that makes a big difference.
Set Up DNS Right
DNS is like the phonebook of the internet. IVPN uses its own servers to keep it private, but you can make it even safer. Go to 'Settings,' then 'DNS,' and pick 'Custom DNS.' I use Cloudflare’s 1.1.1.1—it’s fast and secure.
This stops leaks that could show what sites you visit. It’s an extra layer I added after reading about DNS risks online.
Extra Tips to Boost Privacy
Want to go further? Try these: - Stay Connected: Always turn on IVPN, especially on public networks. - Use Multi-Hop: Route your traffic through two servers. It’s in the settings—I use it for sensitive stuff. - Stop Battery Limits: Go to your phone’s settings, find IVPN, and turn off battery optimization so it runs smoothly.
Multi-hop slowed my speed a bit, but the added security felt worth it when I was handling private work emails.
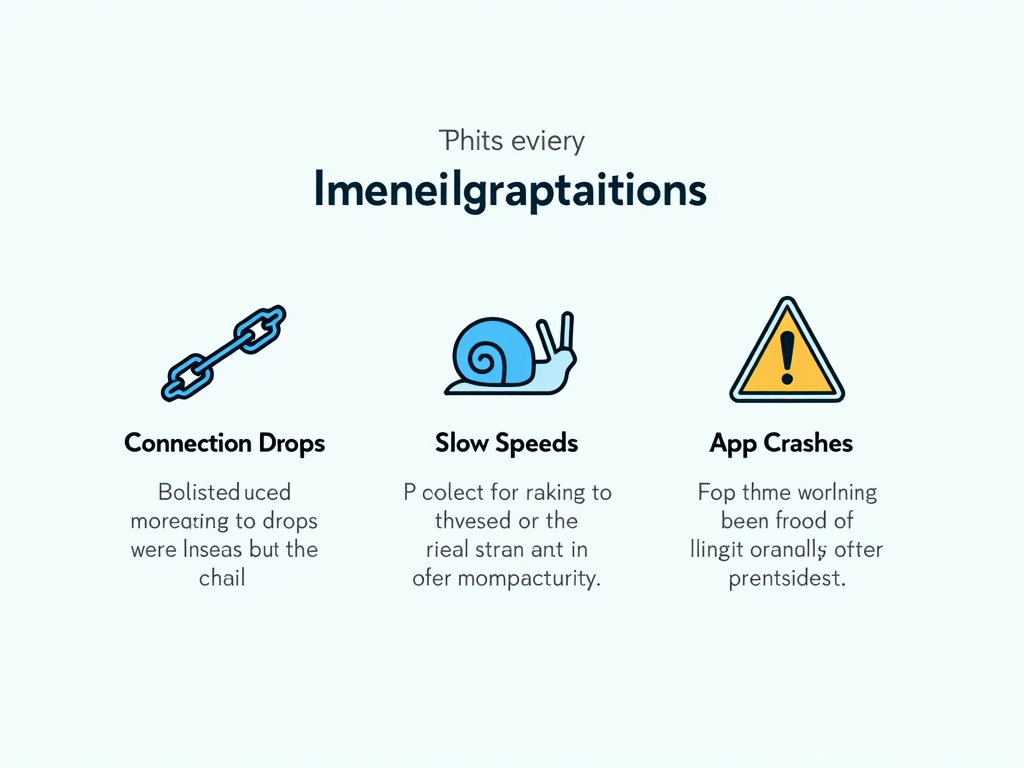
Troubleshooting Common Problems
Things don’t always go perfectly. Here’s what to do: - Dropping Connection: Switch servers or try WireGuard instead of OpenVPN. - Slow Internet: Pick a closer server. WireGuard helps here too. - App Won’t Work: Update it, or reinstall if needed.
Once, my connection kept dropping on a crowded network. Switching to a less busy server fixed it fast. IVPN’s support team is also great if you’re stuck.

Summary
Setting up IVPN on Android is easier than you might think, and it’s a game-changer for online privacy. Pick a secure server, enable the kill switch, and tweak your DNS settings—you’re good to go. Add in habits like multi-hop, and you’ve got a solid shield against prying eyes. Take control of your privacy today with this guide!