How to Use Mullvad's DNS over VPN: A Comprehensive Guide
Online privacy is a growing concern in today's digital age. With cyber threats, data breaches, and surveillance on the rise, protecting your personal information has never been more crucial. One effective way to safeguard your online activities is by using a Virtual Private Network (VPN). A VPN encrypts your internet traffic and hides your IP address, making it difficult for anyone to track your online behavior.
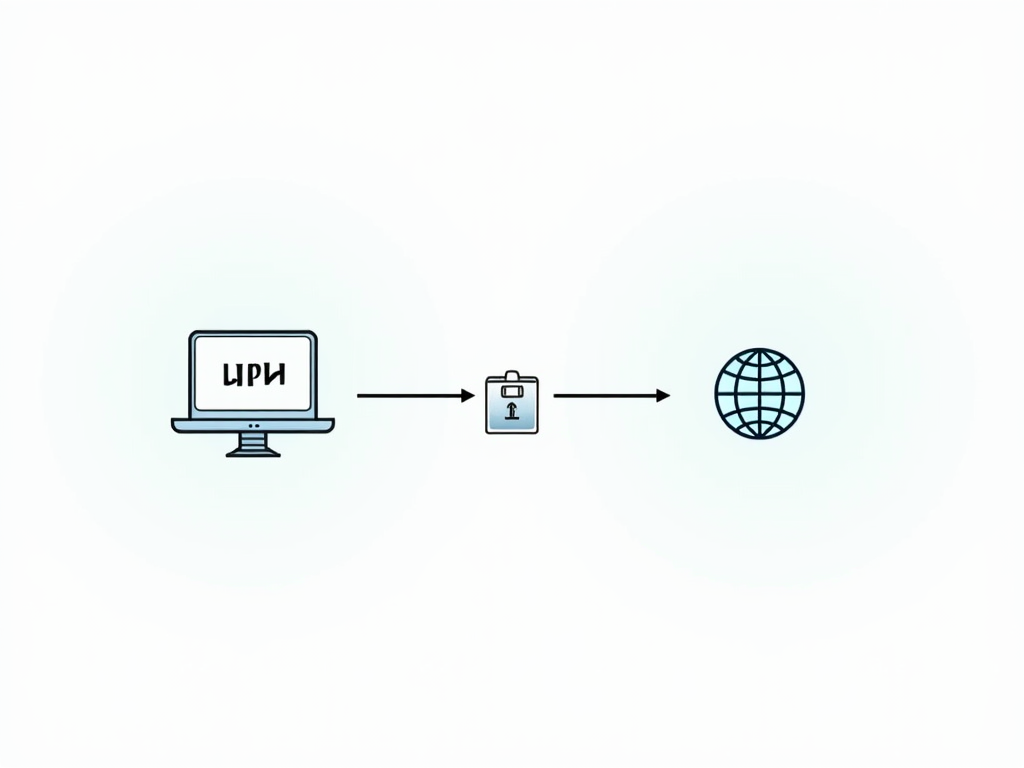
However, even when using a VPN, there's a potential weak link in your privacy chain: your DNS requests. DNS, or Domain Name System, is the system that translates human-readable domain names into IP addresses that computers can understand. Every time you visit a website, your device sends a DNS request to resolve the domain name, and this request can reveal your browsing history to your internet service provider (ISP) or other third parties.
This is where Mullvad's DNS over VPN feature comes into play. Mullvad is a reputable VPN service known for its strong commitment to privacy. Their DNS over VPN feature ensures that your DNS requests are routed through the VPN tunnel, keeping them private and secure.
In this comprehensive guide, we'll delve into what DNS over VPN is, why it's essential for online privacy, and how you can easily set it up with Mullvad's VPN service. Whether you're a privacy enthusiast or just starting to explore online security tools, this article will provide you with valuable insights and practical steps to enhance your digital privacy.
What is a VPN?
A Virtual Private Network (VPN) is a technology that creates a secure and encrypted connection over a less secure network, such as the internet. Originally developed for businesses to allow remote employees to access corporate networks securely, VPNs have become increasingly popular among individual users for protecting their online privacy and security.
Here's how a VPN works:
-
Encryption: When you connect to a VPN, your internet traffic is encrypted before it leaves your device. This means that even if someone intercepts your data, they won't be able to read it without the encryption key.
-
Tunneling: Your encrypted data is sent through a secure 'tunnel' to the VPN server. This tunnel prevents outsiders from seeing your data or knowing where it's coming from.
-
IP Address Masking: The VPN server assigns you a new IP address, which masks your real IP address. This makes it appear as though your internet traffic is coming from the VPN server's location, not your actual location.
By using a VPN, you can:
- Protect your data from hackers, especially when using public Wi-Fi networks.
- Bypass geo-restrictions and access content from different regions.
- Prevent your ISP from monitoring your online activities.
- Enhance your anonymity online by hiding your real IP address.
For a more in-depth understanding of VPNs, you can refer to the Electronic Frontier Foundation's guide on VPNs. The EFF is a leading organization in the fight for digital privacy and free speech, and their resources are highly regarded in the privacy community.
What is DNS?
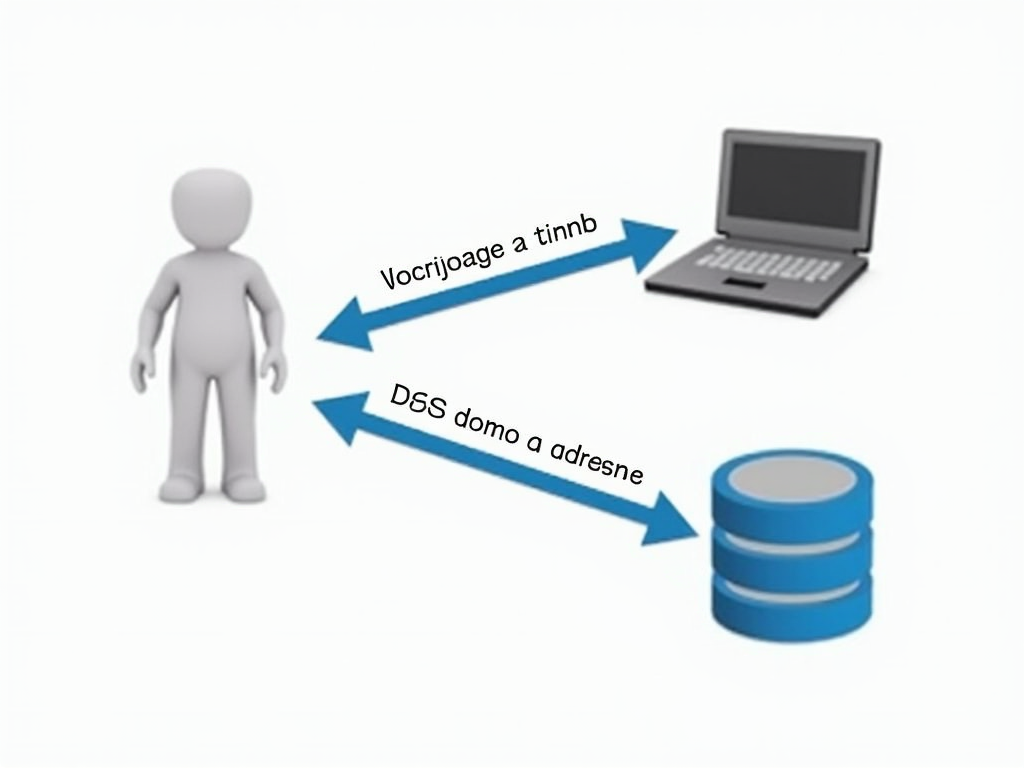
The Domain Name System (DNS) is a fundamental component of the internet that acts as a decentralized directory. It translates human-friendly domain names, like www.example.com, into IP addresses, such as 192.0.2.1, which are used by computers to identify each other on the network.
Here's a simplified explanation of how DNS works:
-
User Request: When you enter a domain name in your web browser, your device sends a DNS query to a DNS resolver, typically provided by your ISP.
-
DNS Resolver: The DNS resolver checks its cache to see if it already knows the IP address for that domain. If not, it forwards the query to other DNS servers until it finds the correct IP address.
-
Response: Once the IP address is found, it's sent back to your device, allowing your browser to connect to the website's server.
While DNS is essential for navigating the internet, it poses a privacy risk. Since DNS queries are usually sent in plain text, your ISP or anyone monitoring your network can see which websites you're trying to visit, even if the website itself uses HTTPS encryption. This means that your browsing history can be logged and potentially used for various purposes, such as targeted advertising or surveillance.
To learn more about DNS and its implications for privacy, you can read this informative article by Cloudflare, a company known for its expertise in internet infrastructure and security.
Why is DNS over VPN Important for Online Privacy?
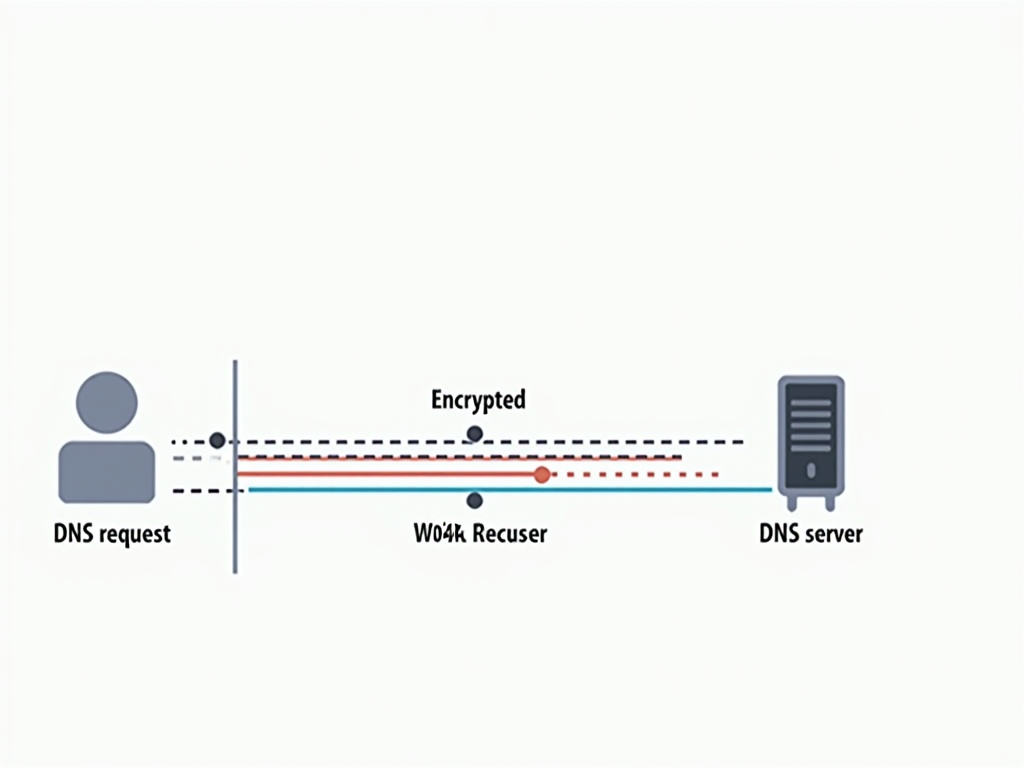
When you use a VPN, your internet traffic is encrypted and routed through the VPN server, which helps protect your privacy. However, if your DNS queries are not also routed through the VPN, they could still be visible to your ISP or other third parties. This is known as a DNS leak, and it can compromise your privacy by revealing your browsing history.
DNS over VPN addresses this issue by ensuring that your DNS queries are sent through the VPN tunnel along with your other internet traffic. This means that your DNS requests are encrypted and hidden from your ISP, providing an additional layer of privacy.
Here are some key benefits of using DNS over VPN:
-
Prevents DNS Leaks: By routing DNS queries through the VPN, you eliminate the risk of DNS leaks, ensuring that your browsing history remains private.
-
Enhances Security: Encrypting DNS queries protects them from interception and manipulation by malicious actors, such as in DNS spoofing attacks.
-
Maintains Anonymity: Since your DNS queries are handled by the VPN provider's DNS servers, your ISP cannot associate your browsing activities with your IP address.
A study conducted by researchers at Princeton University highlighted the privacy risks associated with DNS queries. Their research, detailed in the paper 'The Security Impact of HTTPS Interception', demonstrates how DNS data can be used to infer sensitive information about users' online behavior.
By using DNS over VPN, you can mitigate these risks and take control of your online privacy.
How Does Mullvad's DNS over VPN Work?
Mullvad is a VPN service provider that prioritizes user privacy and security. One of the features that sets Mullvad apart is its built-in DNS over VPN functionality. When you connect to Mullvad's VPN, all your DNS queries are automatically routed through the VPN tunnel, ensuring they are encrypted and private.
Here's how it works:
-
Automatic Configuration: Mullvad's VPN app is designed to handle DNS queries securely by default. When you connect to a VPN server, the app configures your device to use Mullvad's own DNS servers.
-
Encrypted DNS Queries: Your DNS queries are sent through the encrypted VPN tunnel to Mullvad's DNS servers. This prevents your ISP or any other party from seeing or logging your DNS requests.
-
No Logging: Mullvad operates its own DNS servers and has a strict no-logging policy, meaning they do not keep records of your DNS queries or any other identifying information.
-
DNS Leak Protection: Mullvad's app includes built-in DNS leak protection, which ensures that even if there are configuration issues, your DNS queries do not leak outside the VPN tunnel.
For users who want to verify their DNS settings, Mullvad provides tools and guides on their website. You can check if your DNS is properly configured by visiting Mullvad's DNS leak test page.
By using Mullvad's DNS over VPN feature, you can be confident that your online activities remain private and secure.
Step-by-Step Guide to Using Mullvad's DNS over VPN
Setting up and using Mullvad's DNS over VPN is straightforward, thanks to their user-friendly app. Follow these steps to get started:
-
Sign Up for Mullvad: If you don't already have an account, visit Mullvad's website and sign up. Mullvad offers a unique account system where you don't need to provide personal information; you simply generate an account number.
-
Download the App: Download the Mullvad VPN app for your device. Mullvad supports Windows, macOS, Linux, iOS, and Android.
-
Install and Log In: Install the app and log in using your account number. Mullvad's app is designed to be intuitive, with a clean interface that makes it easy to connect to a VPN server.
-
Connect to a Server: Open the app, select a server location from the list, and click 'Connect.' Mullvad has servers in numerous countries, allowing you to choose a location that suits your needs.
-
Verify DNS Settings: Once connected, your DNS queries will automatically be routed through the VPN. To confirm, you can visit Mullvad's DNS leak test page and ensure that no leaks are detected.
-
Enjoy Private Browsing: With DNS over VPN enabled, you can browse the internet knowing that your DNS queries are secure and private.
If you encounter any issues, Mullvad's website offers extensive documentation and support resources. Additionally, their customer support team is responsive and helpful.
For advanced users, Mullvad also provides options to customize your VPN connection, such as choosing specific protocols or enabling features like the kill switch, which prevents data leaks if the VPN connection drops.
Personal Insights and Experiences
As someone who values online privacy, I've tried several VPN services over the years, and Mullvad stands out for its commitment to user anonymity and security. What I appreciate most about Mullvad is their no-nonsense approach to privacy: no personal information required, no logging, and transparent policies.
Using Mullvad's DNS over VPN feature has been seamless. I didn't have to fiddle with any settings; it just worked out of the box. When I ran DNS leak tests, I was pleased to see that my queries were indeed being handled by Mullvad's servers, with no leaks detected.
One experience that highlighted the importance of DNS over VPN was when I was traveling and using public Wi-Fi at a café. Knowing that public networks can be insecure, I connected to Mullvad's VPN. Later, I checked my connection details and saw that my DNS requests were encrypted and routed through the VPN, giving me confidence that my browsing was private.
Another aspect I like about Mullvad is their dedication to open-source software. Their app is open-source, which means that the code is publicly available for scrutiny, adding an extra layer of trust.
Overall, Mullvad's DNS over VPN feature is a valuable tool for anyone looking to enhance their online privacy without sacrificing ease of use.
Summary
In today's digital landscape, protecting your online privacy is essential. While VPNs are a powerful tool for securing your internet traffic, ensuring that your DNS queries are also protected is crucial for maintaining complete privacy. Mullvad's DNS over VPN feature offers a simple and effective solution by routing your DNS requests through the VPN tunnel, keeping them hidden from prying eyes.
In this guide, we've covered:
- The basics of VPNs and DNS
- The importance of DNS over VPN for online privacy
- How Mullvad implements DNS over VPN
- A step-by-step guide to setting it up
- Personal insights on using Mullvad's service
By following the steps outlined in this article, you can take control of your online privacy and browse the internet with greater security and anonymity.